

WebRTC is an open-source project that enables real-time communication between browsers and mobile applications through a simple set of APIs. It stands for "Web Real-Time Communication" and has become a popular technology used in various applications, including video conferencing, voice calling, and file sharing. Many popular apps such as Discord and Google Meet use WebRTC to enable high-quality real-time communication between users. By leveraging its peer-to-peer connection, WebRTC offers efficient communication, low latency, and secure communication. Let's take a closer look at how this technology works
In this blog, we will go over how a WebRTC works from a layman's perspective and a technical perspective. Finally, we will implement a basic messaging feature using webRTC.
The Method Behind The Madness
Let's explain it in layman's terms first for the non-technical folks reading this.
Imagine you have 2 friends A and B, but A and B are not friends. You three plan to go to a movie. Unfortunately, you are busy with some work and can't coordinate between A and B to choose the place and time to book the tickets. So what would you do in this situation?
If you were WebRTC you would
Ask A if they want to talk to B.
You take A's phone number/ Instagram id or any other way someone can connect with A.
You will tell B that A wants to connect with him and share A's contact details.
You will take B's contact details and share them with A.
A reaches out to B via his preferred contact method, let's say WhatsApp.
A and B start talking and sharing their ideal location and schedule, and book tickets accordingly.
Woohoo, let's go, you made them communicate with each other without you being there.
The Technical Wizardry of WebRTC
Let's look at the points mentioned in the previous section in a simple way.
A wants to connect to B.
A finds out all the possible ways someone can connect to it.
B finds out all possible ways someone can connect to it.
A and B signal this session information via other means. Ex- WhatsApp, server.
A connects to B via the most optimal path.
A and B also exchange their support media and security.
The core concepts of WebRTC
Before understanding how WebRTC establishes a between 2 devices, we need to know a few networking topics.
NAT - Network Address Translation
NAT is the process by which multiple private IP addresses in a local network are mapped to a single public IP address before communicating with the Internet.
Here is a diagram to explain how it handles requests when you go to a website.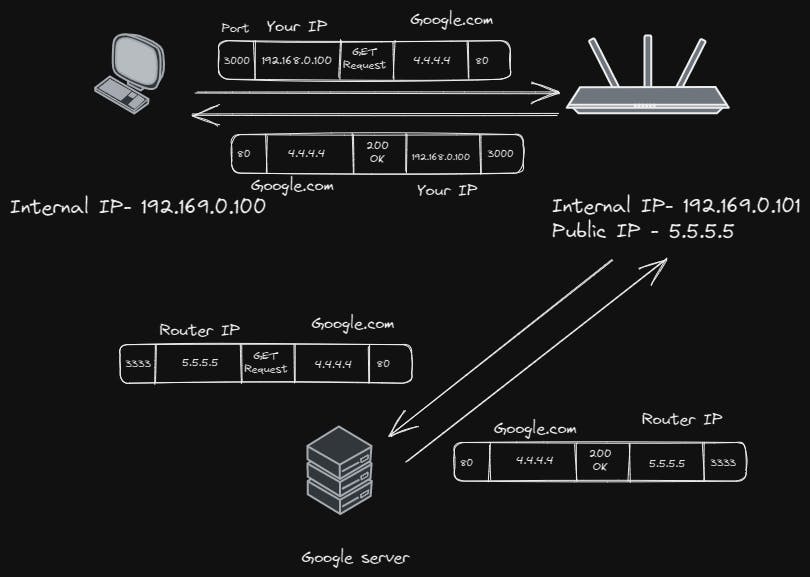
There are different types of NAT but let's not go in too deep about it.
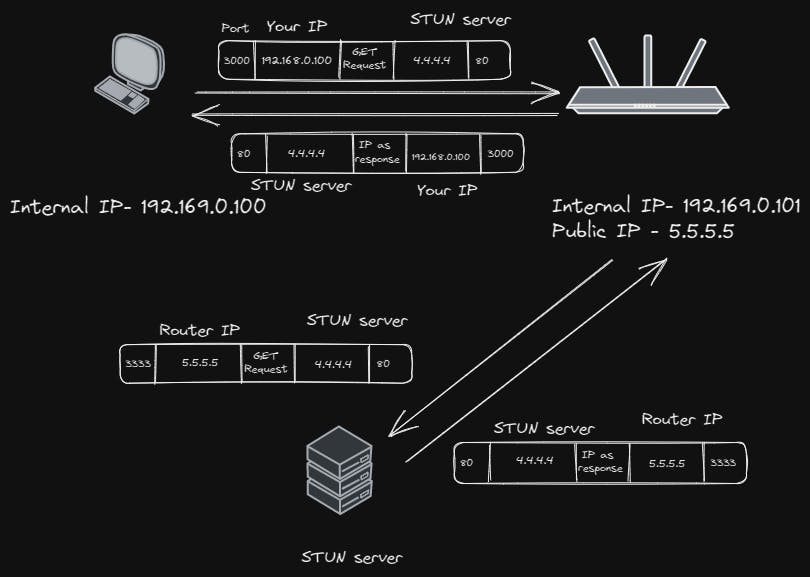
STUN - Session Traversal Utilities for NAT
Since your device uses NAT to interact with the internet, it does not know its public IP address. It's just a simple server that sends you your public IP address as the response. Google offers many free STUN servers since it's cheap to maintain. You can host one on your own too.
TURN - Traversal Using Relays around NAT
TURN is used where STUN cannot be used. If you have a Symmetric NAT STUN cannot be used. TURN servers have to pass the data through them to the 2nd device, hence this is expensive to maintain.
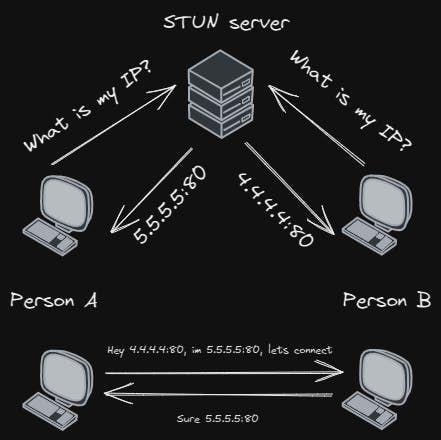
ICE - Interactive Connectivity Establishment
An ICE candidate collects all available candidates such as the local IP addresses, and STUN addresses. All the collected addresses are then sent to the 2nd device via SDP.
SDP - Session Description Protocol
It is a data format that describes ice candidates, networking options, media options, security options, and other stuff.We generate an SDP for a device and send it to the 2nd device through any means(WhatsApp, server, QR code, Twitter). SDP is just a string.
SDP Signaling
Sending the SDP to the other device is called signaling
How WebRTC establishes the connection
With the new concepts we just learned, we can describe the steps we discussed previously in a better way.
A wants to connect to B.
A creates an "offer", it finds all ICE candidates and other stuff and generates the SDP, The offer is the SDP.
A signals the offer to B through any means.
B creates the "answer" after setting A's offer.
B signals the offer to A through any means.
A and B are now connected.
Once the connection is established, we can share anything over the connection. Such as text, video, voice, files, etc.
Implementing a basic WebRTC chat
The WebRTC API is already available in your browser, you don't have to install any packages.
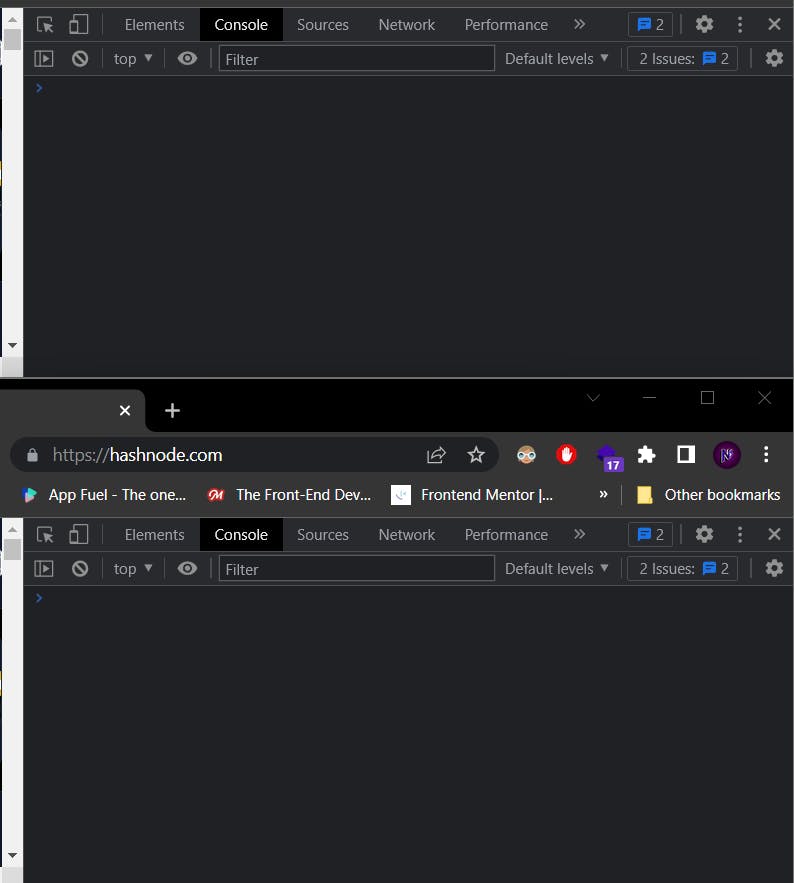
Let's start by opening two empty browser windows side by side and opening the console.
now, let's create a local connection peer and a remote connection peer using the RTCPeerConnection.
// in first console
const localConnection = new RTCPeerConnection()

// in second console
const remoteConnection = new RTCPeerConnection()
next, we will create a callback function that will print out the SDP every time a new ICE candidate is generated.
// in first console
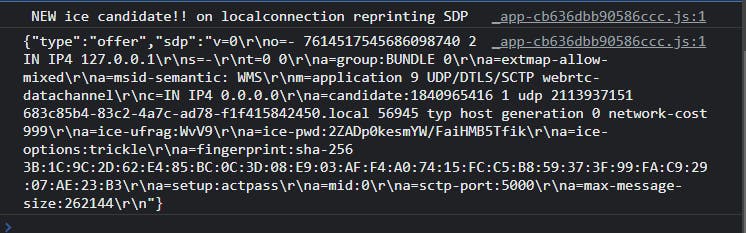
localConnection.onicecandidate = e => {
console.log(" NEW ice candidate!! on localconnection reprinting SDP " )
console.log(JSON.stringify(localConnection.localDescription))
}
// in second console
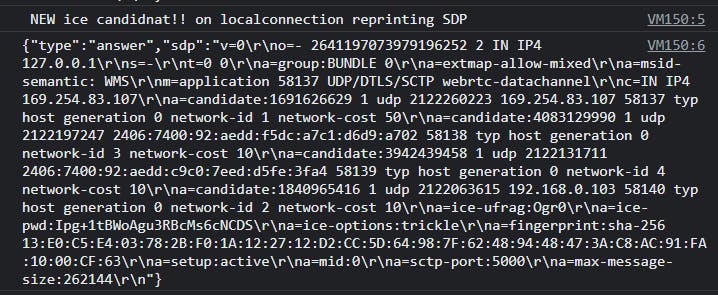
remoteConnection.onicecandidate = e => {
console.log(" NEW ice candidate!! on localconnection reprinting SDP " )
console.log(JSON.stringify(remoteConnection.localDescription) )
}
Next, we create a data channel using which we can send and receive messages. Then we add a callback function to print out the message we receive. and print when the connection is opened and closed.
// in the first console
const sendChannel = localConnection.createDataChannel("sendChannel");

sendChannel.onmessage = e =>  console.log("messsage received!!!"  + e.data )
sendChannel.onopen = e => console.log("open!!!!");
sendChannel.onclose =e => console.log("closed!!!!!!");
then we create an offer, which is an SDP to send to the remoteConnection. and set that offer as the local description, which basically means the local user.
localConnection.createOffer().then(o => localConnection.setLocalDescription(o))
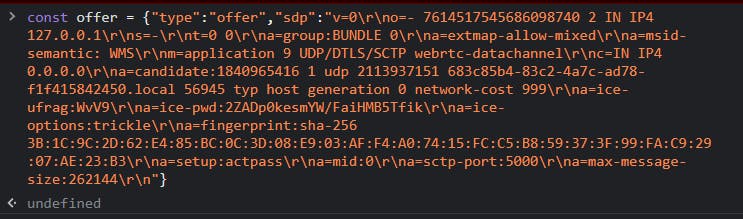
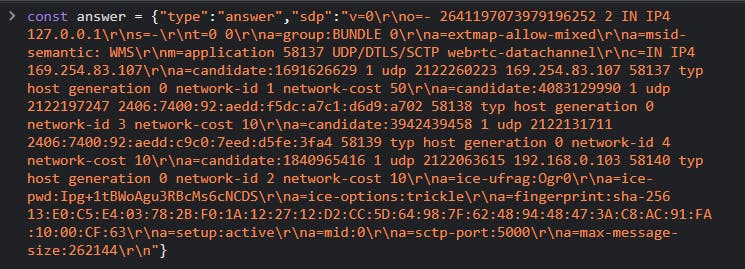
you will see the SDP printed on your console after this. You need to copy the object you see below and set it as the offer in the remoteConnection using any means since both are on the same computer we can just copy and paste.
in the second console,
then we create a data channel and callback functions like we previously did
remoteConnection.ondatachannel= e => {
      const receiveChannel = e.channel;
      receiveChannel.onmessage =e =>  console.log("messsage received!!!"  +             e.data )
      receiveChannel.onopen = e => console.log("open!!!!");
      receiveChannel.onclose =e => console.log("closed!!!!!!");
      remoteConnection.channel = receiveChannel;

}
Then we set the offer as the remote description in the second console.
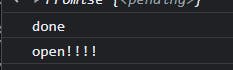
remoteConnection.setRemoteDescription(offer).then(a=>console.log("done"))
you will see the answer SDP, copy it and paste it into the first console.
then we set the answer as the remote description.
localConnection.setRemoteDescription (answer).then(a=>console.log("done"))
now, you will see this on your console, it means that the connection is established between both the consoles.
You can now use the channel to send messages to the other console.


Let's go! we just created peer-to-peer messaging right in our browser with a few lines of code. This is the benefit of WebRTC.
Here's the complete code for Both consoles for your reference.
// in the first console
const localConnection = new RTCPeerConnection()


localConnection.onicecandidate = e =>  {
console.log(" NEW ice candidate!! on localconnection reprinting SDP " )
 console.log(JSON.stringify(localConnection.localDescription))
}


const sendChannel = localConnection.createDataChannel("sendChannel");
 sendChannel.onmessage =e =>  console.log("messsage received!!!"  + e.data )
   sendChannel.onopen = e => console.log("open!!!!");
     sendChannel.onclose =e => console.log("closed!!!!!!");


localConnection.createOffer().then(o => localConnection.setLocalDescription(o) )
// Take the offer and save it as the offer here
// const offer = YOUR SDP
const remoteConnection = new RTCPeerConnection()

remoteConnection.onicecandidate = e =>  {
console.log(" NEW ice candidnat!! on localconnection reprinting SDP " )
 console.log(JSON.stringify(remoteConnection.localDescription) )
}


remoteConnection.ondatachannel= e => {

      const receiveChannel = e.channel;
      receiveChannel.onmessage =e =>  console.log("messsage received!!!"  + e.data )
      receiveChannel.onopen = e => console.log("open!!!!");
      receiveChannel.onclose =e => console.log("closed!!!!!!");
      remoteConnection.channel = receiveChannel;

}


remoteConnection.setRemoteDescription(offer).then(a=>console.log("done"))

//create answer
await remoteConnection.createAnswer().then(a => remoteConnection.setLocalDescription(a)).then(a=>
console.log(JSON.stringify(remoteConnection.localDescription)))
//send the anser to the client
// back to the first console after the previous step
// const answer = YOUR ANSWER SDP
localConnection.setRemoteDescription (answer).then(a=>console.log("done"))
Now you know how WebRTC works under the hood and can use it confidently!
In conclusion, we learnt how WebRTC works from both a layman's perspective and a technical perspective. Additionally, we learnt how to implement a basic WebRTC chat using the WebRTC API already available in modern browsers. Overall, WebRTC has become a popular technology that is changing the way we communicate online.
Thank you for taking the time to read this article! If you found it helpful or informative, we would greatly appreciate it if you could give it a like or share it with others who might benefit from it. Thank you again for your support!